9 Version control
Version control systems (VCS) are essential for managing intricate research projects, tracking changes in code and text systematically. Distributed version control systems (DVCS) like Git preserve different versions of content, offering significant advantages over local or centralized VCS. In Git, every user possesses a complete repository copy, ensuring redundancy and flexibility. This decentralized approach enhances collaboration, enabling multiple contributors to work independently on the same project, ensuring data integrity and maintaining the project’s reproducibility. Git’s flexibility and redundancy make it an ideal choice for researchers and developers, facilitating organization and preserving the integrity of their work.
Reproducible Collaboration: Git enables collaboration among multiple contributors, ensuring that changes are tracked, documented, and reproducible, promoting transparency and teamwork
Traceable Versioning: Git provides a detailed version history, allowing users to trace back every change made to the project, ensuring transparency and facilitating the reproduction of specific project states
Error Reversal: Git allows for reversal of errors, enabling researchers to quickly identify and correct mistakes, ensuring that the project remains consistent and reproducible
Attributable Contributions: Git records the contributions made by each team member, attributing specific changes to individuals. This transparency aids in understanding who contributed what, ensuring accountability and facilitating collaboration
Documentation and Context: Git commits contain detailed messages, providing context for changes made. This documentation enhances the reproducibility of the project by allowing others to understand the reasoning behind specific alterations
What is version control?
Let’s say you are writing a paper. You will edit your paper and might want to keep different versions of it. A common way to handle that is by using different file names for different versions.

This way of “version control” is outdated and error-prone. The most common proper version control system today is Git, which I’d like to introduce to you now.
Git for version control
Git is free and open source 😃🙌.
With Git you can track different versions of your paper. For each version you can add a description (“commit message”) and you even automatically track who made which change if you are working in a group. You can always go back to old versions.
The way you work with Git is that you have the version database both on our computers and on a server. To get the changes from and to the server you use commands (pull = download stuff from server, push = upload stuff to server).
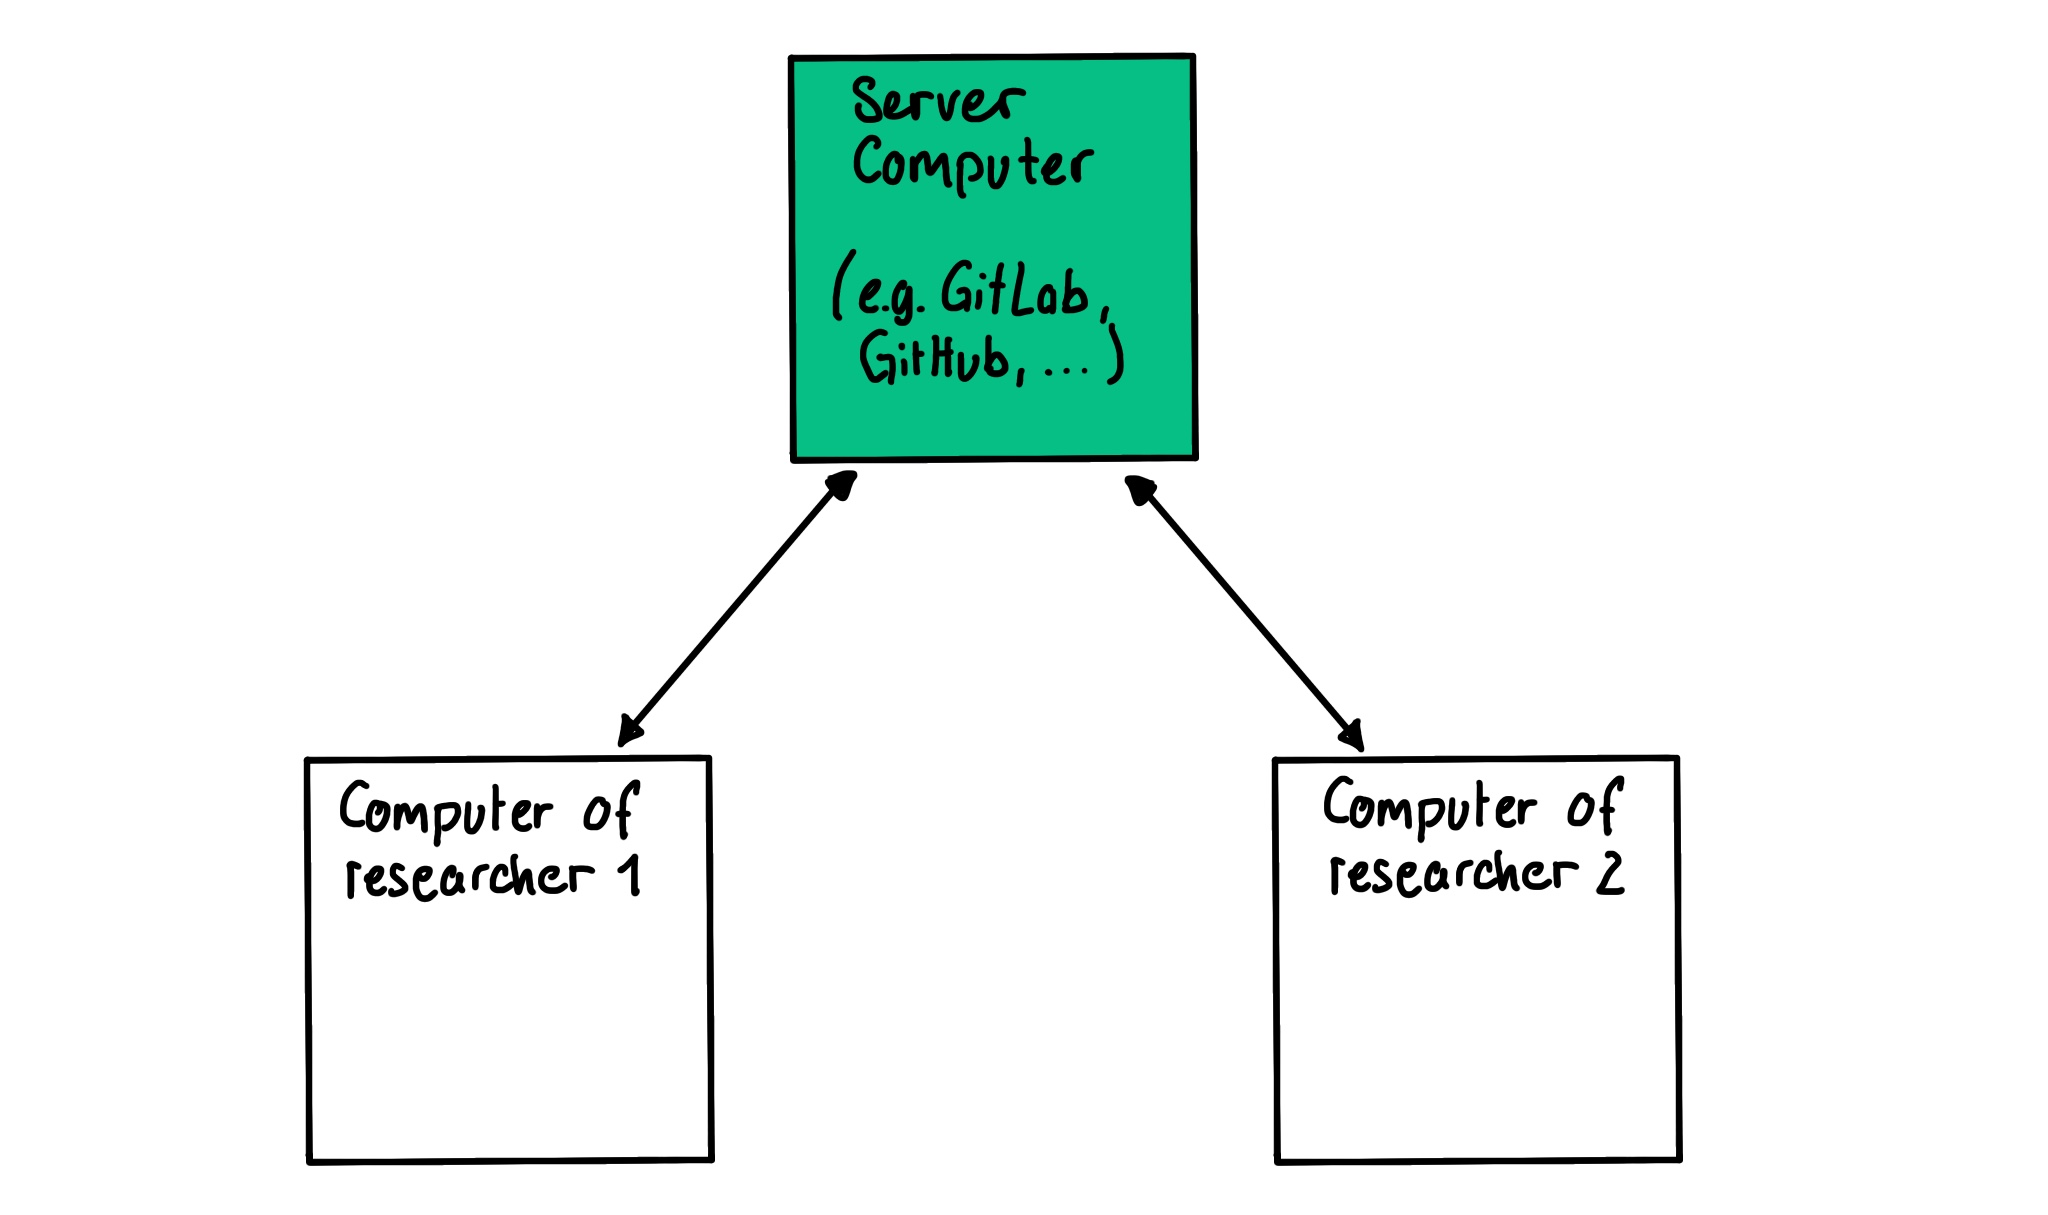
Most researchers use GitLab or GitHub as platforms for working with Git and they also serve as a neat front end for the server. GitLab and GitHub give us some extra neat features for collaboration (e.g. issues, Wiki, …).
Learning Git can be daunting 🙀. Historically it was developed by software engineers for other software engineers. That makes it particularly useful for us when writing code, but it can also feel a bit too nerdy in the beginning. I promise though, once you’ve got the hang of it, you’ll love it!
The difference between Git, GitHub and GitLab
Git: A distributed version control system enabling local tracking of code changes, allowing collaboration and version management.
GitHub: A web-based platform hosting Git repositories, offering collaborative features like pull requests, issues, and wikis. It provides tools for team collaboration and project management.
GitLab: A Git repository manager providing source code management, CI/CD pipelines, issue tracking, and more. GitLab can be self-hosted or used as a cloud-based service, giving users control over their infrastructure and development process.
You can use GitHub or GitLab alongside Git when you need centralized collaboration, project management, community engagement, remote backup, and automated continuous integration and deployment workflows. But you can also use the command line tool Git independently if you only work locally. In this example, we use Git together with GitHub. However, the process would also be very similar if you use GitLab.
Install and work with git and GitHub (Video Tutorial)
Install Git on your computer 💻
Depending on the system you are working on, there are different ways to install Git.
For the latest stable version for Linux Ubuntu run this command in your terminal:
apt-get install gitUsually on Mac Git is already installed by default. To see if it’s already there you can open your terminal and type:
git --versionThe Output should show you a version of Git.
If not you can use homebrew to install it in your terminal. Install homebrew if you don’t already have it, then type:
brew install gitIf you are working on Windows, I recommend installing Git Bash. This provides you with a terminal where you can work similarly to the terminal on Mac and Linux, using the same commands. Git Bash also automatically installs Git for you. You can download Git for Windows here.
You can visit git-scm.com to get more information on how you can download Git for your system.
Create a new Repository on GitHub
Sign in to GitHub:
Open your browser, go to GitHub, and sign in to your GitHub account. If you don’t have an account, you can create one by clicking on the “Sign up for GitHub” button.
Create a New Repository:
In the upper-right corner of any page, click on the + icon and select “New repository.” Alternatively, on your GitHub profile page, click on the “Repositories” tab, and then click the green “New” button.
Fill out the Repository Information:
Enter a Repository name: Choose a name for your repository. This name will be part of your repository’s URL.
Enter a Description: Optionally, you can add a description of your repository.
Choose Public or Private: Decide whether you want your repository to be public (visible to everyone) or private (accessible only to people you specify).
Initialize this repository with a README: Check this option to create a README file for your repository. A README file provides information about your project. Including a README.md file in your repository provides essential project information such as a brief description, installation instructions, usage guidelines, and contribution guidelines. It acts as a guide for users and contributors, enhancing the understanding and adoption of your project.
Choose a .gitignore file: If your project involves specific programming languages or frameworks, you can select a
.gitignoretemplate to exclude certain files from version control. The .gitignore file is crucial for excluding specific files or directories from version control. This ensures that sensitive or irrelevant files (like configuration files, logs, or compiled binaries) are not inadvertently shared or committed. It keeps your repository clean, reduces clutter, and avoids potential security risks. You don’t have to it for now.Choose a license: If you want to add an open-source license to your repository, you can choose one from the provided options. You don’t have to it for now.
Create the Repository: - Click the green “Create repository” button. Your new repository is now created.
Note: Starting from a local repository and pushing it to GitHub later is a common approach. However, it’s important to note that for successful pushing, you need to initialize an empty repository on GitHub first to avoid divergence issues when the initial commit history differs between your local repository and the remote repository on GitHub. This ensures seamless syncing and collaboration between local and remote versions of your project.
Clone a GitHub Repository to your local machine
I will show you how to clone a repository with ssh key. When you are on Github in your repository and select the green button <> code, you can choose https or ssh under the cloning points. If you choose https you have to identify yourself later with your GitHub password. The SSH key is another authentication method that is more secure in comparison. If you want to know how to create an SSH key pair, check here.
Clone GitHub Repository with SSH URL:
Open the terminal on your computer.
Use the git clone command with the SSH URL of your GitHub repository to clone your repository to your local machine:
git clone git@github.com:username/repository.gitMake sure to replace username with your GitHub username and repository with your repository name.
Navigate into the newly created directory:
cd repositoryMake Changes:
Make a change to your README.md file. You can use your favorite editor for this, e.g. Notepad ++, nano, or vim. In the video tutorial you can see how to make the change with the nano editor.
The command git status
When you run the git status command, Git provides you with information about the current state of your repository. Here’s what the typical output messages mean:
On branch [branch name]: Indicates the name of the branch you are currently on. Branches allow you to work on different features or versions of your project simultaneously.
Changes not staged for commit: Git detects modifications in your working directory that haven’t been staged yet. These changes won’t be included in the next commit unless you explicitly add them.
Changes to be committed: Lists the changes that are staged and ready to be included in the next commit. These changes will be part of the commit when you run
git commit.Untracked files: Shows files in your working directory that Git is not tracking. These files are not included in version control until you explicitly add them using
git add.Your branch is ahead of ‘origin/[branch]’ by [number] commits: Indicates that your local branch has commits that haven’t been pushed to the remote repository (origin). It suggests that you might want to push these changes to keep the remote repository up-to-date.
nothing to commit, working tree clean: This message appears when there are no changes in your working directory or staged changes waiting to be committed. Your repository is in a clean state.
These messages help you understand the status of your repository, indicating which files have been modified, which changes are staged for commit, and if your local branch is ahead or behind the corresponding branch on the remote repository. Understanding git status output is essential for effective version control and collaboration.
Check Status and Stage Changes:
Check the status of your repository to see which files have been changed:
git statusYour output from git status should look something like this:
> $ git status                                                                               [±master ●]
On branch master
Changes not staged for commit:
  (use "git add <file>..." to update what will be committed)
  (use "git restore <file>..." to discard changes in working directory)
    modified:   README.md

no changes added to commit (use "git add" and/or "git commit -a")
This message means there are changes in the README.md file that have not been staged for commit. You need to use git add README.md to stage the changes, and then git commit -m "Your message" to commit them.
Stage the changed file:
git add README.mdCommit Changes:
Commit the changes with a descriptive message:
git commit -m "Description of the changes made"Replace "Description of the changes made" with a brief description of the changes you made. The -m flag in git commit is used to add a commit message directly from the command line. When you use git commit -m "Your message", you can include a brief description of the changes you are committing without opening a text editor, making the commit process quicker and more efficient.
Push Changes to GitHub:
Push your changes to your GitHub repository:
git push origin mainAfter this step is successful, your changes are published to your GitHub repository! 🎉
Most common commands in Git
| Command | Description |
|---|---|
git init |
Initiates a new git repository |
git status |
Shows the status of all files in the working directory and the staging area |
git add |
Add a new file or changes made to a file to the staging area |
git commit |
Creates a new commit that contains all changes from the staging area and adds it to the project’s history |
git push |
Adds commits from a local repository to a remote repository (e.g. GitHub or GitLab) |
git log |
Shows the history of all commits |
git diff |
Shows changes made to files since the last commit |
git pull |
Adds commits from a remote repository (e.g. GitHub or GitLab) to a local repository |
git remote add origin |
Connects a local repository with a remote repository |
git clone |
Creates a local copy of a remote repository |
git config |
Can be used to show or change general options of a repository |
Other version control systems
There are many other ways of doing version control out there.
Subversion: Simpler systems like Subversion are used less these days as Git offers more flexibility.
Google docs and friends: Many online text editors (Google Docs, OneDrive, …) offer versioning now. It is not as advanced and versatile, but a nice way to work in a WYSIWYG (What You See Is What You Get) editor. Git works in its entirety only with plain-text files, such as Markdown, HTML, JSON or LaTeX. For formats that are not plain-text, such as PDF or Word files, some features that git brings with it do not work. You can still commit these files to git, but e.g. the highlighting of line-by-line changes does not work with these files.
Versioning data: Version control of data is a difficult task. Let’s leave that for another day. See here for more info for now.
Further reading
- Version Control, The Turing Way
- Version Control with Git, Software Carpentry
- Version Control with Git (for R users), Anna Krystalli
- Set up Git with RStudio & GitLab, Heidi Seibold